

Description
What our Symmetry lesson plan includes
Lesson Objectives and Overview: Symmetry enables students to define symmetry, recognize a line of symmetry for a two-dimensional figure, identify line-symmetric figures and draw lines of symmetry. Engage critical thinking and generalize understanding as students explore the ways the human body is symmetrical and the reasons why it does not have perfect symmetry. At the end of the lesson, students will be able to define symmetry, recognize a line of symmetry for a two-dimensional figure, identify line-symmetric figures, and draw lines of symmetry. This lesson is for students in 4th grade, 5th grade, and 6th grade.
Classroom Procedure
Every lesson plan provides you with a classroom procedure page that outlines a step-by-step guide to follow. You do not have to follow the guide exactly. The guide helps you organize the lesson and details when to hand out worksheets. It also lists information in the blue box that you might find useful. You will find the lesson objectives, state standards, and number of class sessions the lesson should take to complete in this area. In addition, it describes the supplies you will need as well as what and how you need to prepare beforehand.
Options for Lesson
Included with this lesson is an “Options for Lesson” section that lists a number of suggestions for activities to add to the lesson or substitutions for the ones already in the lesson. One optional addition to this lesson is to create additional shapes for folding to practice identifying symmetry. For an additional activity, you can take your students outdoors to find symmetrical items in nature. To expand the lesson, you could discuss the symmetry of other animals in addition to humans. For additional practice, you could use the coloring pages in the additional resources and have your students draw the other half of animals and other objects. Your students may also create their own symmetrical pictures with half left blank to exchange with another student to complete. Students can also use a school photo, cut it in half, and draw in the other half.
Teacher Notes
The teacher notes page includes a paragraph with additional guidelines and things to think about as you begin to plan your lesson. This page also includes lines that you can use to add your own notes as you’re preparing for this lesson.
SYMMETRY LESSON PLAN CONTENT PAGES
Symmetry
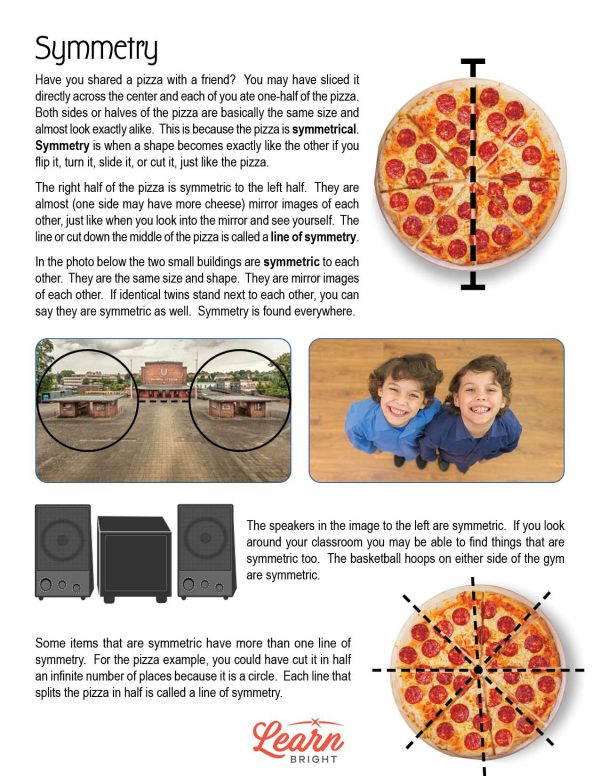
The Symmetry lesson plan includes two content pages. If you’ve ever shared a pizza with a friend, you may have sliced the pizza directly down the center and each eaten one-half of the pizza. Both sides, or halves, of your pizza are basically the same size and shape. The two halves match because the pizza is symmetrical. Symmetry is when one shape looks exactly like the other if you flip it, turn it, slide it, or cut it (like the pizza!).
The right and left halves of the pizza are symmetrical, because they are almost mirror images of each other. Think about looking into the mirror and seeing a mirror image of yourself. The line, or cut, down the middle of the pizza is the line of symmetry.
The lesson includes a few photos of symmetrical things. One shows two small buildings that are the same size and shape. The next shows identical twins. The third image shows two speakers that are the same size and shape. Symmetry is everywhere!
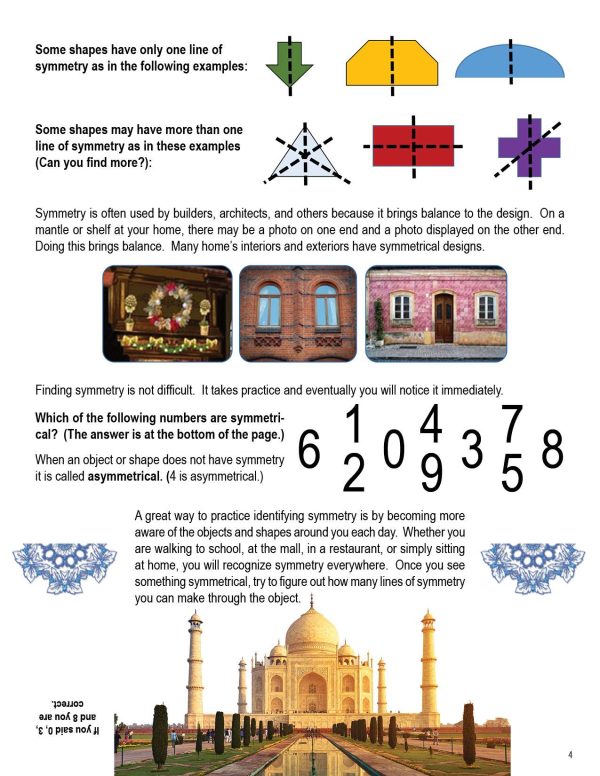
Some items have more than one line of symmetry. For example, you could cut a pizza in half in an infinite number of places because it is a circle. Each line splitting the pizza in half is a different line of symmetry. Other shapes have only one line of symmetry. The lesson shows a few examples of shapes that only have one line of symmetry and shapes that have multiple.
Builders and architects often use symmetry in their work to bring balance to their designs. A shelf or mantle in your house might have a photo placed on both ends to make it symmetrical and balance it.
Finding symmetry is easy! Once you practice seeing symmetrical objects and shapes, you’ll start to notice them all around you. For practice, the lesson lists a few numbers and asks which numbers are symmetrical. An object or shape that does not have symmetry is asymmetrical.
You can practice identifying symmetry by paying attention to the objects and shapes around you. When walking to school, at the mall, in a restaurant, or sitting at home, you will recognize symmetry. When you see something symmetrical, try to figure out how many lines of symmetry you can make through that object!
SYMMETRY LESSON PLAN WORKSHEETS
The Symmetry lesson plan includes three worksheets: an activity worksheet, a practice worksheet, and a homework assignment. You can refer to the guide on the classroom procedure page to determine when to hand out each worksheet.
SHAPES ACTIVITY WORKSHEET
For the activity worksheet, students will first cut out each of the 10 shapes on the worksheet. Next, they will fold each shape (folding more than once if needed) to determine their line or lines of symmetry. Finally, for each shape, they will write the number of lines of symmetry on the chart.
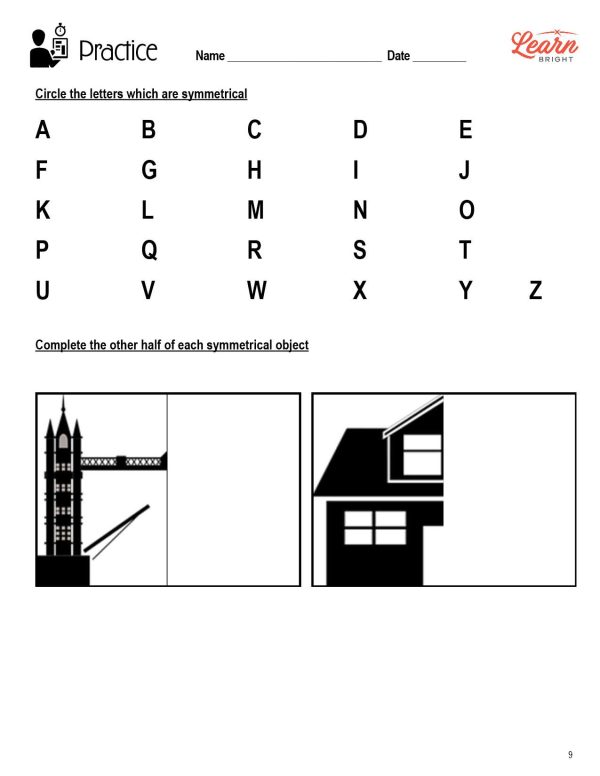
SYMMETRICAL LETTERS PRACTICE WORKSHEET
The practice worksheet asks students to first circle the symmetrical letters. They will also complete the other half of each of the symmetrical objects shown.
SYMMETRY HOMEWORK ASSIGNMENT
For the homework assignment, students will use the space on the worksheet to draw four symmetrical objects from their home or neighborhood. They will also describe the objects in the open space below each drawing.
Worksheet Answer Keys
This lesson plan includes answer keys for the activity worksheet and the practice worksheet. If you choose to administer the lesson pages to your students via PDF, you will need to save a new file that omits these pages. Otherwise, you can simply print out the applicable pages and keep these as reference for yourself when grading assignments.